This is the second article in a series of short step-by-step guides to introduce you to the best tool for album design—Adobe InDesign. In the first guide, we covered InDesign preferences. Here, we'll take a peak at document setup and the pages panel.
Document Setup
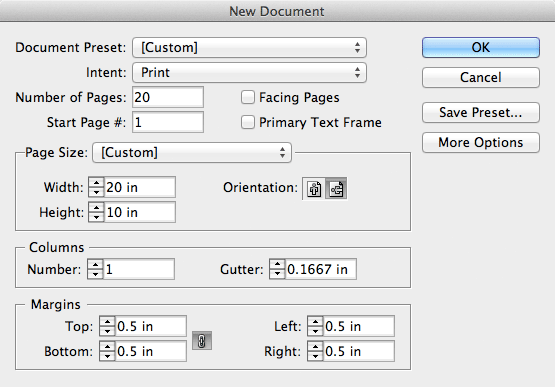
Open InDesign and go to File->New->Document
- Turn OFF "Facing Pages"
- Set "Number of Pages" to the number of spreads your book has. For example, if you're designing a 40 page book, that would be 20 spreads.
- Set the width and height to your spreads' width and height. For example, for a 10x10 book, you'd enter 20x10.
- Leave everything else as is, and press OK
InDesign will load all your spreads (20 in this case) and you're ready to start designing. But before you do, let's go over the Pages panel.
Pages Panel
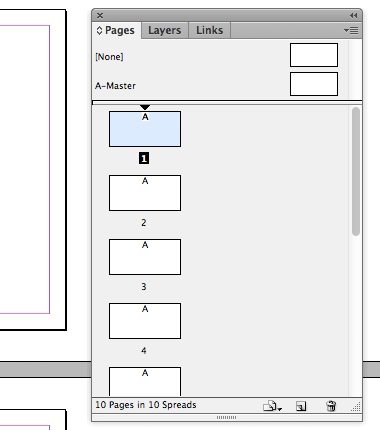
The Pages Panel allows you to easily navigate and manage your document's pages, or in this case spreads.
The Pages Panel displays thumbnails of each spread in your book, with the active spread highlighted.
Navigating spreads works as you would expect: simply double-click the spread you want to work on and InDesign will take you there.
Managing spreads is just as easy: simply drag-and-drop to arrange them, or right-click for additional options such as insert, duplicate, move, delete, etc.
Master Pages
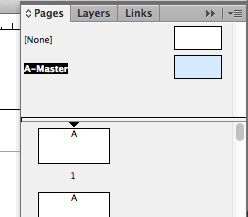
By default, all spreads have the "A-Master" applied to them, as noted with the letter "A" on top of each spread.
Master pages, located at the top of the Pages Panel, are kind of like templates. You can double-click to open them, and anything you place on them will be placed on the spreads to which they're applied.
Master pages are great for placing guides and/or backgrounds that you want to appear on all the spreads of the book.
Conclusion
Setting up your document correctly and understanding how to work with Pages panel is half the battle to creating a great album in InDesign. You're well on your way! In the next article we'll cover guides, frames, and image placing. Stay tuned!