So far in our “InDesign for Wedding Photographers” article series, we covered InDesign Preferences, showed you how to set up a document, and gave you a quick overview of the Pages panel—including master pages. In this article we’ll go over guides, frames, and placing images.
Guides
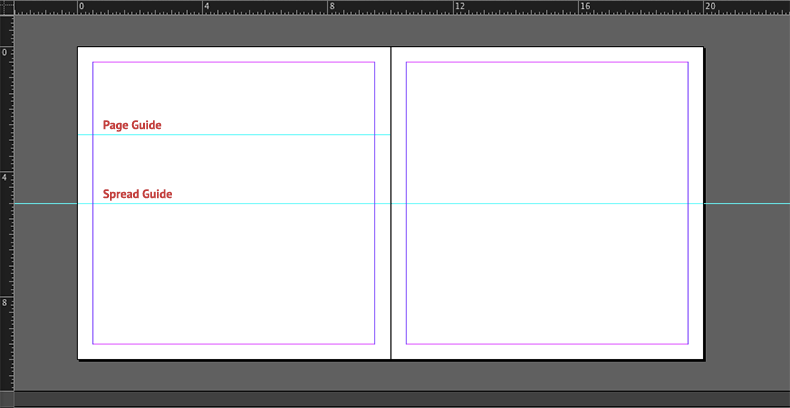
As a Photoshop user, you already know how to draw guides; you simply drag-and-drop from the rulers to where you’d like the guide placed (press Command + R to show or hide Rulers). Because InDesign works with spreads and/or pages, it allows you to draw a guide for either a single, specific page—or across an entire spread. For a page specific guide, click and drag inside a single page. To create a guide that stretches across an entire spread, hold down the Command/Control key while drawing the guide.
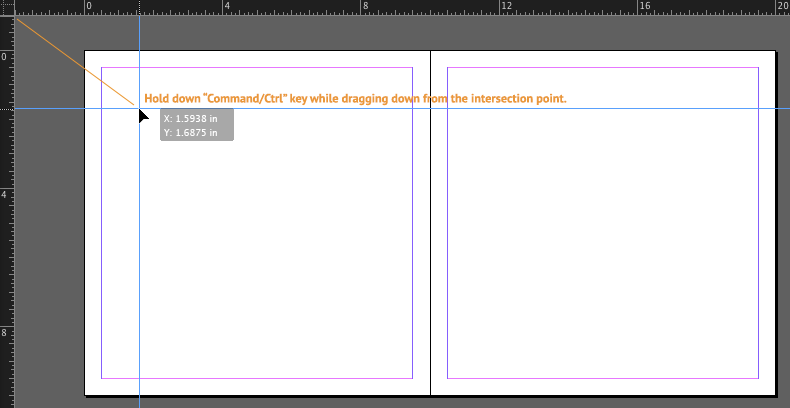
You can also draw vertical and horizontal guides—at the same time—by dragging them from the intersection point while holding down the Command/Control key.
One of the most helpful guide drawing tools for wedding album design is the “Create Guides” feature. By choosing Layout->Create Guides, you can quickly create a series of guides. Depending on your design, you can even specify whether or not you want the guides fitted to the document’s margins or pages.
Guides Fitted to Margins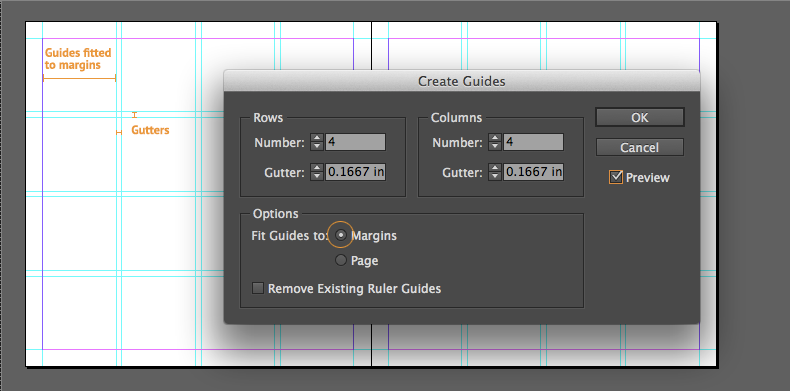
Guides Fitted to Page
Frames and Image Placing
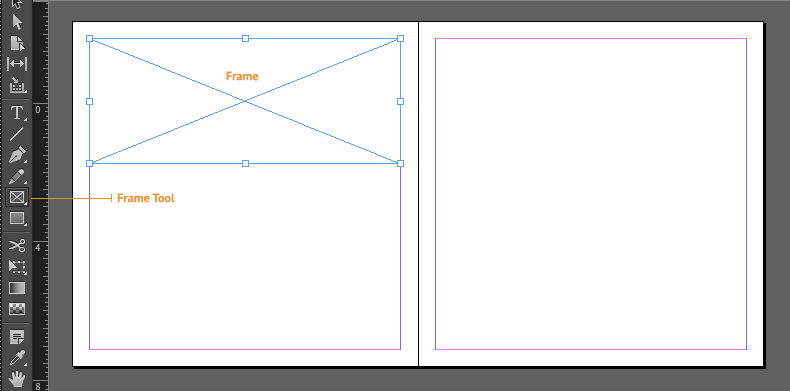
Everything placed in InDesign lives in a frame. When it comes to wedding album design, InDesign frames are essentially like image placeholders. You can create frames from scratch using the frame tool, or let InDesign automatically create them for you using “place” feature.
To create a frame from scratch, grab the Frame tool (keyboard shortcut F), and simply draw a rectangle on a page where you’d like the frame appear.
Note: Hold “Shift” key while dragging to create a perfect square.
Our favorite tip: While drawing a Frame and holding the mouse button down, press the up or right arrow keys to add rows or columns. 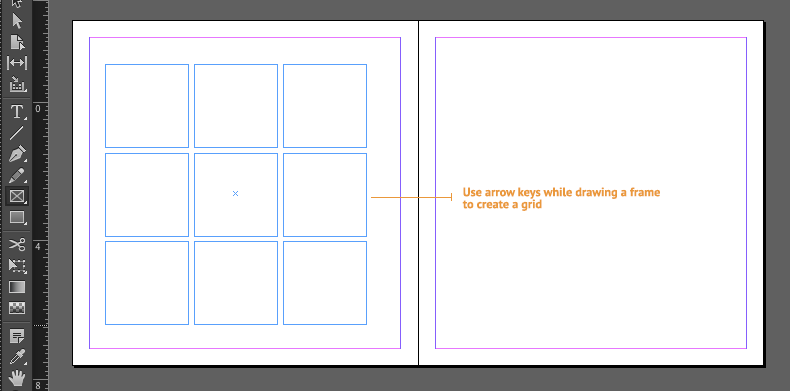
Once the frames are drawn, you can simply drag-and-drop from your hard-drive, Adobe Bridge, or another file browser to place images into the frames. Couldn’t be simpler.
If you’ve completed Step 2, from our “Getting Started with InDesign” tutorial, the placed image will fit perfectly into your frame. If you haven’t, or if you need to adjust the position and/or fit of the image, you can right click on the frame and choose Fitting>Fill Frame Proportionally or whichever option best fits your needs.
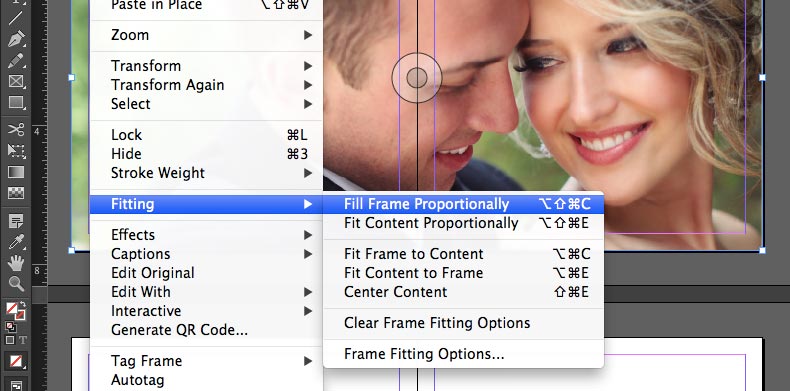
In addition, you can use the Direct Selection Tool (A) to reposition the image manually by simply dragging it within the frame.
Conclusion
So there you have it! A super quick intro to InDesign for Wedding Album Design. For more in-depth tutorial check out:
InDesign for Wedding Photographers video
Workflow + Album Design CreativeLIVE workshop
Album Moxie: The Savvy Photographer’s Guide to Album Design and More with InDesign.